Learn how to navigate the Decision Tool screens and features.
*Please note: The Decision Tool is only available to Oji Decide learners.*
Getting Started in the Decision Tool
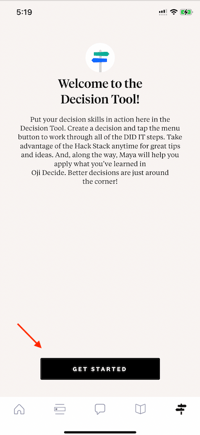
When you open the Decision Tool for the first time, you’ll be asked to create a decision. Tap on GET STARTED to continue:
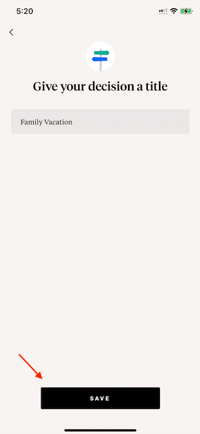
Next, you’ll be asked to name your decision. Enter a short decision name like “new hire” or “family vacation” and select SAVE to continue:
Exploring the Decision Tool
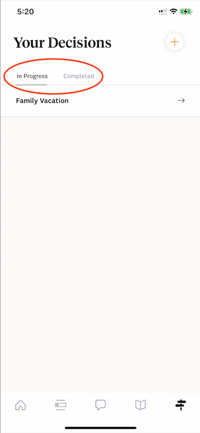
- Decision List
a. To access the Decision List, tap on the Decision List icon located on the upper left hand corner.
b. All of your decisions are listed here, on the Decision List. You can access decisions that are “In Progress” by tapping on the “decision name”. Completed decisions can be accessed by tapping on Completed.
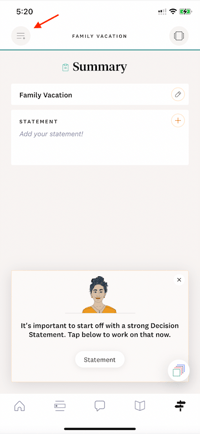
2. Summary Screen
-
- When you tap on a decision, you see the Summary for the decision. Below, you see some basic stats on your progress.
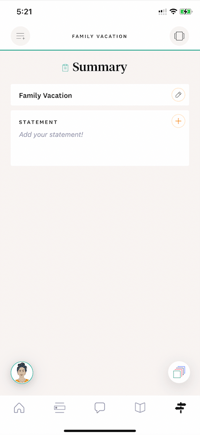
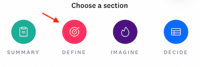
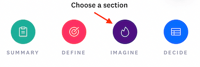
3. Screen Menu
a. Tap on the Screen Menu icon, located at the bottom right, to fill out your decision.
Look familiar? Each screen matches a step from DID IT.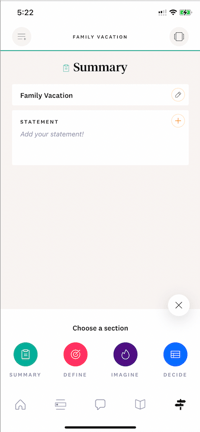
Exploring the Screen Menu
- Define Screen
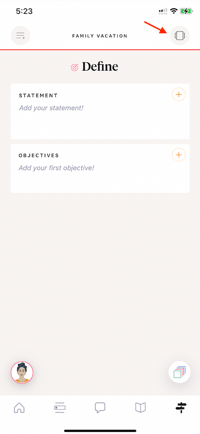
a. If you tap on Define, you see a screen where you can enter your decision statement and objectives.
b. Just tap the + button to edit your info.
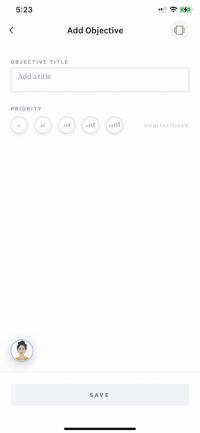
c. To add or edit an objective, tap on the + sign to the right of the Objectives field to open the Add Objectives screen.
d. Enter your objective at the top, in the "Add a title" text box.
e. Below, you can indicate the priority of the objective. Tap on SAVE to save your objective.
3. Maya
-
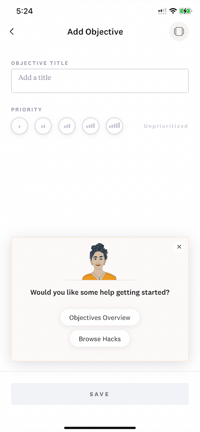
- Have you noticed Maya at the bottom left of the screen? She’s there to help you apply DID IT as you work on your decision. Tap on her and she’ll provide ideas and guidance as you proceed.
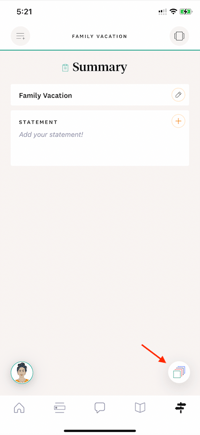
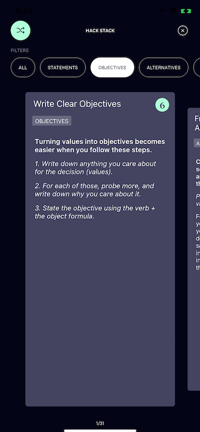
4. Hack Stack
-
- The Hack Stack is a great resource of tips and ideas that you can use to improve every part of the decision-making process. To open the Hack Stack, tap on the Hack Stack button located in the top right hand corner of the screen.
c. You can browse the stack - with over 80 hacks - anytime. Sometimes, Maya will offer to show a hack, or you’ll come across them in a learning step.
d. To browse the stack, swipe to the right or tap on a “FILTER” at the top. To exit the Hack Stack, tap on the “x” on the upper right hand corner.
-
- From the Screen Menu, tap the + sign next to Alternatives to enter the options you’ve identified.
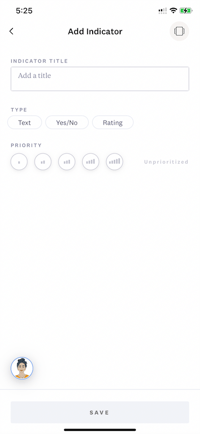
6. Indicators Screen
-
- The Decision Tool allows you to work with three types of indicators: text, yes/no, and ratings.
- To enter a rating, select the TYPE of rating and select SAVE to continue.
- Ratings are for situations where you want to measure the alternative subjectively. For example, if you’re assessing a sales candidate’s presentation skills, you could use a rating.
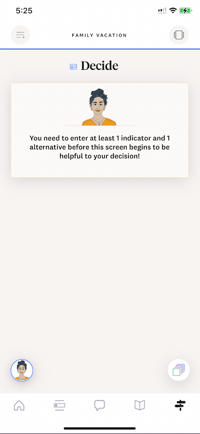
7. Decide Screen
-
- If you tap on Decide, you see a screen that shows alternatives and indicators.

-
- This screen allows you to “fill in the blanks” with the data you need to assess your options. Go ahead and play with it - it’s super cool.